
Why does the monitor sometimes go dark for a second? The monitor turns off when Windows starts or during a game: what to do? Unstable operation of the monitor power supply
Does your monitor go blank when loading Windows? Or does your laptop screen go dark? Does it turn on first and then turn off after 1, 2 or 3 seconds? At the same time, the computer itself (the system unit) works, right?
There can be many reasons why the monitor turns off. And this does not depend on what operating system you have: Windows XP, 7, 8 or 10. And it does not even depend on what monitor you have: Samsung, LG, Asus, Acer or Philips. Anyone can have this problem.
Let me immediately note that all malfunctions on PCs and laptops come in two types – hardware and software. Below we will look only at software problems caused by Windows errors or incorrectly installed programs (+ a few general problems). Hardware faults are a breakdown of equipment (monitor, video card, etc.). It is better to contact a service center for this.
Since you don't know why the screen goes blank, you first need to make sure that it's not a hardware error. Below are 10 ways to solve this problem, and you can check them all one by one.
To fix the problem you will need to turn on the computer. You can do this by loading it in safe mode. To do this, when you turn on the screen, press the F8 button repeatedly until a menu appears (in it you must select the “Safe Mode” item). If the Windows logo appears, it means you didn’t have time. Restart your computer and try again.
Turn off the display
Let's start with the simplest. Your monitor turns on, works great, but goes out after 10, 15 or 30 minutes. What is the problem?
By default, Windows is set to “turn off display after N minutes.” It's all about her.
“This can’t be true!” – you say. Maybe. But it's worth checking out. It would be stupid if, because of such a trifle, you spend a lot of time and nerves trying to figure out why the monitor goes out. In addition, the check will only take 2 minutes.
Instructions for Windows 7 users:

On Windows 8 and 10 the procedure is approximately the same.
Instructions for Windows XP users:
- Right-click on the desktop and select “Properties”.
- Go to the "Screensaver" tab and click the "Power" button (bottom right).
- See the familiar “Display off” field and select “Never” (or any other value).
It's all about humidity
Another popular reason is humidity. You may not believe it, but if a PC or laptop is left in a room with humid air for a long time, this causes malfunctions in its operation. As a result, the monitor turns on and immediately turns off. And all because condensation can accumulate in it, which, naturally, will not do anything good.
What to do in such a situation? Just leave your computer off for a while and let the water evaporate. This will solve the problem (if, of course, that is the problem).
How long have you cleaned your system unit or laptop?
The problem is as old as the world, but still. How long has it been since you cleaned your computer? If it's been a long time, then that could be the problem. And now you are trying to understand why the monitor lights up and goes out immediately after loading Windows...

Dust can interfere with the operation of the video card or RAM, so it is recommended to clean the system unit as soon as possible. Or take it to a service center and have them clean it. And in the future, do not run your computer to this state.
Poorly connected wires
The next reason the monitor turns off is poorly connected wires. We are talking about a cord from the monitor to the system unit (more precisely, to the video card). Perhaps you accidentally caught it or pulled it. Perhaps one of your family members did this, or maybe even your favorite cat or dog.
In any case, this should be checked first. To do this, simply disconnect the wire on both sides, wipe (blow), and then connect it again. May I help.
To begin with, it is recommended to unplug the cord only from the monitor side. If the message “No signal” appears on it, then I have 2 news for you. The good one is that everything is fine with it, it is not broken, and the bad one is that you still don’t know why the screen immediately turns off when you turn it on.
Another common problem is cable damage. To check this, you need to find a similar cord and connect it.
Malfunction of random access memory (RAM)
For this reason, the monitor goes out quite less often, but it still happens sometimes. Perhaps you recently bought new RAM. Or maybe she just had time.

If you have several sticks of RAM, you can disable one. Or swap them. You can also check your RAM from a friend or take his RAM and connect it at your place. If this is the problem, you will immediately understand it.
Video card malfunction
Most often, the monitor turns on for 2 seconds and goes off due to a faulty video card. After all, it is she who is responsible for displaying the image on the screen. And the cord from the monitor is connected just to it.
The most reliable way to make sure that the monitor is going dark because of the video card is to connect another one and try to turn on the computer. You can take it from your friends or acquaintances (if you have any).
As an alternative, you can connect another monitor (again, you need to borrow one from friends). If you do not have this option, then skip this step and move on to the next one.
The problem may be due to overheating of the video card. The cooler (fan) is broken, the cooling system is not doing its job, etc. To make sure of this, turn off your computer and wait 20-30 minutes (more is possible). If the problem was overheating, then it should turn on normally. In this case, you will need to resolve the issue of cooling the video card or replacing it.
Video card driver conflict
Another reason is a video card driver conflict. To check this, do the following:
- Start – Control Panel – Device Manager (for convenience, you can select the “Large icons” view mode in the upper right corner).
 How to open Device Manager
 - In the new window, click on the “Video adapters” item, after which the name of your video card will be displayed.

- Right-click on it, select “Properties” and look at the status. If the video card is functioning normally, then this will be written in the new window.

- Next, select the “Resources” tab and see if there are any conflicting devices.

- If everything is in order, then hide all windows. Next, right-click on the desktop, select “Screen Resolution” and select the minimum – for example, 800x600 pixels. Click “Apply” and restart your PC. If it turns on, congratulations, the problem is fixed.
The video card driver is not working correctly
If the device is NOT functioning normally, some conflicts were detected, or the previous method did not help you, then we will act more aggressively:
- Boot your PC again into safe mode and go to Device Manager.
- Open the “Video adapters” item and find your video card.
- Right-click on it and select “Delete” (don’t worry, this is the usual driver removal procedure).
- Confirm the deletion and restart your PC - it should start in normal mode.
- Install the driver on the video card from the disk included in the kit, or download it from the official website.
- Reboot your computer again to make sure the monitor no longer goes blank.
It is recommended to install drivers only from the disk! There was a case when downloaded from the office. For some reason the sites were installed crookedly. The problem was solved by installing the drivers from the disk (then you can install a new, more current version on top of them).
Motherboard or processor malfunction
This is probably the worst of all possible options. It is a breakdown of the processor or a short circuit in the motherboard that causes the screen to go dark a second after turning it on, but the computer continues to work.
By the way, yes - the system unit can still function. In particular, the coolers will spin, creating the illusion that everything is normal. But in such situations, you may need to replace the processor or motherboard (or at least repair them) - and this will cost you money.
However, problems with the monitor could have occurred for other reasons, but in this particular case it is best to entrust computer diagnostics to specialists.
Why does my monitor turn off during a game?
And finally, one more problem that every gamer has probably encountered while playing. Moreover, such a malfunction can occur only when starting some toys. Quite a sticky situation, right?
In 90% of cases this happens because you have set your monitor settings too high. The fact is that each model only supports a certain resolution and refresh rate. And if you select parameters that exceed its capabilities, then when you start the game the monitor goes blank (the message “Out of range” appears or the screen simply turns black).

But there is one more nuance. And most often it occurs among owners of old monitors - for example, square ones (with a resolution of 1024x768 or 1280x1024 pixels).
The fact is that developers prescribe a certain resolution in games by default. And usually it is much higher than 1280x1024 pixels. After all, it does not support such a high resolution (or refresh rate). This problem was observed in Far Cry 3, S.T.A.L.K.E.R, etc. Then many players complained that the monitor went blank during the game.
Solving this problem is very simple. You just need to find the configuration file. It can be called differently, but it is always in the .ini format. And it is located either in the game folder or in “My Documents”. More precisely, you can find out in Google or Yandex by the name of a specific game.
In that file you need to find the line where the resolution is indicated, change it to your own, save - and you can play.
Instead of a conclusion
Well, I hope one of these methods helped you solve your annoying problem. If your monitor screen still turns on and off, then it may be a faulty hardware issue. In this case, you can look for other ways to solve this problem or immediately contact the service center. But this is up to you to decide.
My monitor, LG Flatron L1917S, began to go dark during operation and immediately after turning it on. I will give the schedule in more detail. Two monitors are connected to my system unit: ASUS PA248QJ and LG Flatron L1917S. The monitors are connected via an Asus AMD Radeon HD7770 video card, which allows you to connect up to 4 monitors simultaneously. One fine day, the second monitor, LG Flatron L1917S, went out while working. What was most interesting was that the green light remained on, indicating that the monitor was working. In the device manager it was listed that the monitor was working normally, but at the same time, the monitor screen was blacker than black.

I tried turning off the monitor with the Power button and turning it on immediately. At first, after turning the power off and on, the monitor started working, but then went out again. A day or two later, the situation looked like this: The monitor turns on for about a second and goes off again.
Initially, I thought that the problem was related to the video card, but when I disconnected the VGA cable from the system unit, the standard “Check cable” message did not appear on the LG monitor. Just in case of emergency, I connected the monitor to the laptop - the laptop determined that the monitor was connected and the monitor was working, but the monitor did not light up. After checking the VGA cable one last time, I finally concluded that the monitor was faulty. I have already repaired it before, but last time, i.e. The power light didn't even light up. Although this time the problem looked completely different, I ventured the assumption that the problems were again related to the monitor's power supply.
Disassembling the monitor
If you know how to disassemble LCD monitors, you can safely skip this part. If you don't know, it's better to read. We will disassemble the LG Flatron L1917S, but many other models are opened using the same principle.
Take a shaped screwdriver and unscrew the six screws.

Next you need to act carefully. The connections of the cases of many monitors and laptops are secured with latches, so the case must be opened carefully, otherwise you can break not only the latches, but also the case itself. According to the LG Flatron L1917S service manual (I managed to find it on the Internet), the case can be opened “with your bare hands.” It really opens, but you can break your fingers, so it’s better to carefully pry off the front frame with a flat-head screwdriver.

In a particular monitor model, the power supply is located in a metal case (circled in red).

For ease of operation, disconnect the plugs with wires. Just in case of emergency, mark where and what you turned off from. As a rule, plugs are made in such a way that they cannot be connected to a “non-native” connector. However, “God protects the careful” - take a marker and make marks on the body.

Checking electrolytic capacitors
After opening the case, first of all we pay attention to the filter capacitors of the secondary circuits.

A visual inspection showed that one of the capacitors was slightly swollen.

I unsoldered the capacitor and checked its capacity using a Victor 205 multimeter, which can measure capacitance. The actual capacitor turned out to be significantly less than the nominal one.

I was almost 100% sure that after replacing this capacitor the monitor would start working, but I was wrong. The situation has not changed. Then I didn’t think much about it and began to desolder and check the remaining electrolytic capacitors one by one (it was not possible to check the capacitances without desoldering, since the capacitors are shunted by other elements). I give the breakdown for all six capacitors at the time of the malfunction:
- C202 (1000 µF x 25V) - actual capacity 857 µF;
- C203 (680 µF x 25V) - actual capacity 403 µF;
- C204 (1000 µF x 16V) - actual capacity 1002 µF (changed during a previous repair 3 years ago);
- C205 (1000 µF x 16V) - actual capacity 256 µF;
- S206 (1000 µF x 25V) - actual capacity 834 µF;
- S207 (470 µF x 25V) - real capacity 409 µF.
Please note that all capacitors, except one (I changed it earlier when the monitor did not turn on at all), have capacities less than the nominal ones. During the repair, the problem was that from the spare parts I could only find two 2200 uF 16 volt capacitors. I was too lazy to run to the TV experts, so I did the following:
- The first capacitor was installed instead of C205 (1000 µF x 16V). Those. the voltage of the capacitor coincided with the “native” one, but its capacity was twice as large;
- I installed the second capacitor instead of C202 (1000 µF x 25V). Not the best solution, since I replaced the 25 volt capacitor with a 16 volt capacitor.
- Native C202 (1000 µF x 25V), installed instead of C207 (470 µF x 25V).
On good terms, we had to look into the TV workshop and buy new capacitors. Anyway. The malfunction was eliminated after replacing capacitor C207 (470 µF x 25V), which was replaced by a capacitor with an actual capacity of 857 µF.

“Sweet couple” - monitors ASUS PA248QJ (left) and LG Flatron L1917S
In such cases, if the monitor is 5-6 years old, there is no need to buy a multimeter with a capacitance meter and check all capacitors. It is safer to replace all the “kanders” with new ones.
Mini-instructions for soldering radioelements
For those who have not soldered radio components before, I will give some simple tips. For repairs you will need a soldering iron, solder, rosin and... a wooden toothpick. Instead of a toothpick, you can use a needle or pin.
After you have soldered the capacitor, you need to remove the solder from the holes for its terminals. To do this, heat the soldering area and insert a toothpick or needle into the hole.

Please note that the toothpick or needle must be inserted from the soldering side, otherwise you can tear the printed conductors from the board. Now you can insert the new electrolytic capacitor, remembering to check the polarity.

Everything is ready to install a new capacitor - the main thing is not to confuse the polarity of the connection
Important! For electrolytic capacitors, the connection polarity cannot be changed. We connect plus to plus, minus to minus. Otherwise, the capacitor will fail.

If for some reason the polarity of the capacitors is not indicated on the printed circuit board side of your monitor, then look at the markings on the radio components side. In this case, the light stripe of the capacitor is aligned with the light mark on the printed circuit board.

It is no coincidence that he said a lot about maintaining polarity. One of the site users, when repairing a monitor, soldered in an electrolytic capacitor incorrectly and for a long time could not understand why the monitor stubbornly did not want to work.
conclusions
A power supply unit (PSU) is found in any monitor and computer. As a rule, it is problems with the power supply that cause the failure of many electronic devices. Failure of various power supply elements can be accompanied by different symptoms. If you remember the previous breakdown of my monitor, when the monitor did not turn on at all, the reason was the loss of capacitance by capacitor C204. This time, it was his neighbor, capacitor C207, who failed. Visually the capacitor looked normal, i.e. the notches did not swell; in fact, its capacity turned out to be significantly less than the nominal one.
What is the reason for the failure of electrolytic capacitors? In this specific case I have two versions:
- Low quality capacitors from SAMXON. I had a little argument about this with my TV technician friend. He claimed that since the monitor was already 9 years old (I bought it in 2006), the service life of the capacitors had expired. To this I noticed that I have a JVC TV (bought in 1996) and which has been working for almost 20 years without repair. Let me also remind you of the fact that the HEC capacitor, which I soldered instead of SAMXON three years ago, did not lose capacity.
- Severe thermal conditions. In this particular case, in my opinion, the ventilation of the power supplies leaves much to be desired. Poor ventilation and close proximity to cooling radiators leads to the fact that capacitor housings heat up to temperatures above 50 degrees Celsius.
That's all for now. If you have any questions, ask them in the comments.
Updated: 01/06/2020 Published: 04/25/2019
Description
The monitor turns off by itself while the computer is running. At the same time, the computer continues to work - sounds are heard. After rebooting, the screen works for a while, then goes blank again. Most often this happens during:
- Games.
- Watching the video.
- Working with any program.
- Using scrolling on a laptop.
- The video card may start to make a lot of noise.
- The monitor may go dark on both a desktop computer and a laptop/monoblock.
- The time that the computer works after loading Windows varies - from a few seconds to several hours.
- The longer the monitor runs, the more often it turns off.
- The monitor may turn off and on, or it may turn off with the message “no signal”.
- It can be permanently turned off. But when you turn it on, you can see the loaded operating system desktop.
Cause
There may be several reasons:
- Monitor malfunction.
- Problems with wires or connectors.
- Video card failure.
- Overheat.
- The software is not working properly.
- Poor power supply.
- RAM malfunctions.
Solution
1. Video card malfunction
If the video card malfunctions, the problems can be of various types, in particular, the monitor may turn off.
To check the functionality of the video card, you can run it in the AIDA64 program. You can also try replacing it temporarily or using an integrated video card (if available).
2. Video card overheating
When overheating occurs, the problem usually occurs under high loads - while working with demanding programs or while playing games. In this case, the fans may begin to make a lot of noise. And the longer the computer works, the more often the monitor turns off.
6. Power problems
With this problem, not only the monitor, but also the computer itself may periodically turn off. This can happen more often under load, for example, when running games or demanding programs.
To check you need:
a) Temporarily change the power supply of the computer itself.
b) Test the socket with a multimeter. It should show a voltage close to 220. The minimum threshold is 190. If it shows lower, the socket needs to be repaired.
In the same way, we check the voltage at the surge protector, if one is used.
c) If a UPS is used, and the multimeter shows that the socket is working, we try to connect the computer directly to the power source.
d) We change all power cables - both for the computer and the monitor itself.
e) Check the tightness of the cables for supplying additional power to the video card (if any).
7. Software errors
In this case, the problem occurs when entering the game, while playing or watching a video. In some cases, the problem can be solved using software methods.
a) Reinstall the video card driver. The best thing . You can also use a specialized program, for example, DriverHub, to update the driver in a semi-automatic mode.
b) Update DirectX.
c) Update or install codecs, for example, K-Lite Code pack.
8. Bad contacts (wires, connectors, adapters)
This reason is characterized by the disappearance of the image without any pattern - at any time. This can also happen when your foot touches the system unit or when the side cover of the case moves. In this case, the screen can turn off and on by itself.
a) First, you should try to tightly secure the cable from the monitor to the video card.
b) Then we try to connect the wire to another connector on the video card, if there are several of them:
* in this image the connectors are different - in this case you will have to use different wires or adapters.
c) If an adapter is used to connect the monitor to the video card, try replacing it.
d) On laptops there may be problems with the contact connectors that connect the monitor to the case. In some cases, this can be repaired by disassembling - cleaning contacts - reassembling.
While working with a personal computer (PC), users from time to time encounter various problems. One of them may be related to the monitor connection. It happens that, having chosen a new monitor and connected it to the PC, it is not possible to get an image on it. Sometimes your old display suddenly stops working. The reasons for this may be various factors, and some problems can be eliminated on your own.
How an image is formed
A video card is used to output the signal to the PC display. It is a complex electronic device that processes information received from a central processor. It then converts it into an accessible signal that the monitor’s electronic components can understand.
Video Data Path
Both electronic components and software - drivers - are involved in the formation of the output signal. Drivers are programs that allow various electronic components to correctly exchange information with each other. They are able to work with the internal parameters of the equipment, allowing you to configure their operating modes using the operating system. Thus, displaying an image on the monitor consists of the following steps:

When the computer is running and the monitor does not show an image, the cause of the problem may be a simple incompatibility between the output of the video adapter and the input of the monitor's scaler. Before purchasing new equipment, you should make sure that it can work with your PC.
Types of signals and connectors
 A signal is an electromagnetic disturbance that has different shapes and frequencies. To convert vibrations into a form that is understandable, complex electronic components are used. Analog transmission is a continuous signal, while digital transmission is a discrete signal, that is, a sequence of short pulses with a certain duration and amplitude.
Digital transmission allows you to transmit a high quality signal using different encryption algorithms. One standard allows for simultaneous transmission of both video and audio content. Analogue transmission is characterized by high susceptibility to interference and low bandwidth compared to digital transmission. Recently, there has been a tendency to move away from the obsolete type of signal transmission - analog.
The simplest connection between a monitor and a video card is to use the same type of interface for transmission and reception. However, there is often a need to convert from one type to another. For this purpose, analog-to-digital (ADC) and digital-to-analog converters (DAC) are used. The devices are connected to each other using not only a regular cord, but also special adapters.
The most popular connectors are VGA, HDMI, DVI. The first is an analog type of transmission, the other two are digital. It should be understood that the connectors themselves can be placed in different places and connected to the video adapter with conductors.
The video adapter itself can be located either on a separate or on the motherboard, or be integrated into the computer’s central processor housing.
Causes of problems
When a problem occurs with the transmission of information, it is important to determine the source of its occurrence. If the monitor does not react at all when you turn on the PC, this means that there is no signal being sent to it from the computer. When the monitor responds to being turned on and the indicator shows activity, the problem is either in the video adapter or in the display itself. When a signal appears on the monitor, but disappears after loading the basic information, the reason is most likely in the PC settings. The reasons why the monitor does not turn on when the computer starts are conventionally divided into two types:
- software dependent;
- associated with hardware faults.

The first type of problem involves operating system settings, in particular device drivers. It is not difficult to determine that the malfunction is software. You will need to observe the monitor's reaction to turning on the computer. The first sign indicating a software problem is the appearance of the BIOS boot window on the display, as well as the problem-free display of the BIOS screen when entering it.
The second includes physical damage caused by damage to the data cable or malfunctions in PC and display components. Such breakdowns are more difficult to diagnose. First of all, you will need to find out what is to blame: the cable, the computer or the monitor. The easiest way to determine this is by replacing elements with known good ones, but such an operation is not always possible.
You should refer to indirect signs indicating the nature of the breakdown. All monitors have a power-on indicator in the form of a light bulb, which can be in several states:

In parallel with this, information may appear on the monitor screen about what operating mode it is currently in, for example, “insert cable,” “frequency exceeded,” “no signal,” etc. If, when you turn on the computer, there is no signal on the monitor, you should listen to extraneous sounds both inside the system unit and the display. If you hear a squeaking or crackling sound from the monitor, it is the fault.
A good diagnostic method is the display on the keyboard. When you turn on the system unit, the LEDs on it should blink. When the screen on the monitor does not light up, you need to press the Caps Lock key and see if the LED on the keyboard lights up. If the light comes on, the malfunction is related to the video signal generation path. If it doesn’t light up, the PC is frozen and you just need to reboot it.
Troubleshooting Software Problems
This kind of breakdown is easy to fix on your own. After a conclusion has been made about a violation in the software, you should start the system unit and go into safe boot mode. To do this, press the F6 or F8 key on the keyboard after turning it on. Booting into safe mode involves launching the operating system with basic drivers configured to the minimum PC hardware settings.

For a video adapter, regardless of manufacturer and power, this means switching to video mode with a low resolution of 640 x 480 and a screen refresh rate of no higher than 60 Hz. In this mode, you need to go to “Computer Properties”, and then to “Device Manager”. There you should select the “Video adapters” tab and remove the installed driver. You can try to set the resolution supported by the display at the desired frequency without uninstalling the driver.
By right-clicking on the desktop, you need to select “Display Settings” (Windows 7 and higher) or “Properties”, and then “Display Options” (Windows XP). In the tab that appears, you need to set the screen resolution and frequency. Typical resolutions for common screen sizes:
- 19 inches - 1280 x 1024 pixels;
- 20 inches - 1600 x 1200 pixels;
- 22 inches - 1680 x 1050 pixels;
- 24 inches - 1900 x 1200 pixels.
After this, after saving the changes, you should restart the computer. If everything is done correctly, the full operating system desktop will load. If you uninstall the driver, the displayed resolution will be low and you will need to reinstall the driver to restore comfortable mode. To do this, you can use the CD that comes with the video adapter, or download it from the manufacturer’s website.
If there is no signal on the monitor, but the computer is working and the BIOS is displayed, the problems may be related to the file system, caused by viruses or accidental user actions. For example, installing low-level software, changing the visual style, etc. Reinstalling the operating system will help eliminate these errors. T which operation is easier to perform than searching for corrupted files.
When several video cards are installed in the system unit, the settings can be reset to outputting images through the integrated card. You need to switch the cable to it or disable the built-in card in the BIOS.
Hardware failures
This type of malfunction is more difficult to resolve than software-type problems. To do this, you need to have at least a little understanding of computer hardware. In case of a hardware problem, the source may be:

According to statistics, 70% of malfunctions associated with the absence of an image on the screen, when the PC takes a long time to start, are hardware failures. Of these, almost 90% are damage caused by faulty electrolytic capacitors on the monitor board and video card.
If you suspect a hardware type of problem, first of all you need to check them for swelling and leaks.
It happens that you sit quietly at your computer or laptop. For example, you are reading an article on a website or a book, and the monitor screen suddenly goes dark. You have to press a key on the keyboard or move the mouse to get the screen backlight to work again.
Why is this happening? The problem lies in the power settings. This is more suitable for laptops and netbooks, because they pay more attention to power supply, and more precisely, to its safety.
The screen only goes dark during inactivity and this is determined by settings that are often simply not adjusted or not paid attention to until the right moment.
Now let's figure it out.
Power settings for windows 7
Right-click on the power icon in the Notification Area
if it is not there, then read the article to set it up. Or click on the triangle next to the Language bar and look for the icon there.
A window like this will appear in which we select Power supply

This can also be found in Start - Control Panel - Power Options (when viewing "Large Icons")
Next we go to Power plan settings
We configure it as you need - increase the time Dimming And Shutdown display from the mains or from the battery (you can turn it off altogether by setting it to “Never”).
Don't forget to click next Save changes

I won’t go into detail, because everything is already quite clear there.
Power settings for windows XP
You can go into settings the same way as in Windows 7: Start - Control Panel - Power Options.
Then go to the tab Power Management Schemes.
You can choose one of the preset schemes - maybe there will be one that you like.
Or change the existing scheme.

Well, if this does not help, then the situation may be much worse than these simple settings to ensure that the monitor screen does not fade away while working.
Similar articles
 Installing a configuration licensing system (CLS) on a Linux server
 International Russian Logistics Center (IR LC) Vnukovo - how to find out the sender of a registered letter?
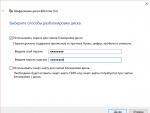
 How to Create a Wi-Fi Hotspot on a Windows XP Laptop
 Skype download free in Russian new version of Skype Download Skype latest version on laptop
 Import XML data Convert excel file to xml
 How to protect files on a USB flash drive A program for protecting a flash drive with a password
 Games that will kill your time Games to pass the time
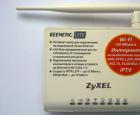 Manual for setting up a Zyxel Keenetic Lite router How to connect a Zyxel Keenetic lite 3 modem
 Mobile portal on MTS. MTS tariffs. MTS tariffs for Internet access
 Choosing mobile applications What a “mobile” EDMS can do